Tuesday, 2 April 2013

Christmas Eve: Slow cooker roast beef

So I know it's a while after the event, but in case there are any people who are new to using their slow cookers, here's how I used mine to make roast beed last Christmas Eve:)


I hadn’t used my slow cooker for literally years, but after seeing so many delicious looking recipes on Pinterest, I decided to haul it out of retirement. I knew that it is one of the more reliable methods of ensuring your meat stays tender and I didn’t want to risk drying out my meat for such a big event. I read so many recipes that I can’t remember who really inspired this one, but it was probably from www.allrecipes.com.
I first browned the beef over high heat on the stove and put it in the slow cooker. I then quartered an onion and laid it all around, along with about 6-8 halved cherry tomatoes and half a cup of red wine and cooked this on high for 4 hours. After 4 hours, I took out the meat, stuck the hand blender in the slow cooker and pureed the onion and tomatoes and poured this mixture into a saucepan on the stove. After bringing it to a boil, I added some Bisto and made a gravy. I then sliced the meat and laid it back in the slow cooker and poured over the gravy and set it on low to keep warm till my guests arrived. It tasted every bit as good as it looked! My fussy, tactile-defensive 6yo even had 3 helpings of the beef :)


Sunday, 31 March 2013

Cake pops


So I was intrigued by this recipe posted by on Facebook  by Skinny Taste today, and decided to try my own version of it. I remembered that I'd bought a cake pop mould online a couple of months ago and had yet to give it a test drive, and today seemed as good a time as any:) 
 I searched online for a while looking for a recipe that suited - I wanted one with less sugar since I knew I would be coating these pops anyway. I found this one by Spark People.

For the recipe, see below. For the long version (with details of my trial and errors with my first attempt at making cake pops...keep reading!

What you're going to need is: 
    INGREDIENTS: 
    1-1/2 cups unbleached flour 
    3/4 cup sugar or other sweetener 
    1/2 tsp. Salt 
    1 tsp. Baking soda 
    3 tablespoons cocoa powder 
    1 tsp. vanilla 
    1/3 cup vegetable oil 
    1 tablespoon vinegar 
    1 cup cold water 


Sift the dry ingredients together. Add the wet ingredients and beat briskly with a wooden spoon till smooth.


Spoon into your cake pop mould (mine uses about a teaspoon of batter per mould) and bake. 


I adjusted the cooking time slightly from the original recipe since my cake pops are quite tiny and don't need as much cooking time as a cupcake.
I baked mine for approx 7 mins, turning the mould over halfway during the cooking time. In retrospect, the tuning them over seemed to have introduced air bubbles which made aboout a third of the batch break in half when I opened the mould. The baking time of 7 mins seemed quite perfect this time. 

The result of round 1 looked like this:


Not so pretty, but after I gave one of the broken/air bubble ones to my 2 year old, she came back 10 second later and said "Want more!", so I reckon they tasted ok :) I gave one a try myself and was very pleasantly surprised - soft, full of rich chocolate flavour but lovely and light in texture - winner!
I filled the moulds as full as they could go the second round and let them bake the full 7 mins on one side instead of turning them. After 7 mins - great! No air bubbles. However, the pops were not nearly cooked through so I put them in for another 3 mins. Still not done, so another 2 mins (now 12 mins in total).


For round 3 I filled them as before and baked for 10 mins - just right.
I let them cool then packed them away so that I could coat them the next morning. 


Now for (what I thought was ) the fun part - coating them and making them beautiful!
I  melted a large Easter bunny because that was what I had in my house! 


I dipped each pop in the chocolate and...voila!


A broken cake pop, imperfectly covered in chocolate. I couldn't understand it. Why was the chocolate not smooth and drippy like in the tutorials? Mine was thick and sticky. I was sooo disappointed! First I thought maybe I hadn't melted the chocolate long enough, so I turned up the heat to see if the chocolate became more melty ... no. So I searched some more and found here that you need to chill the pops for a bit before coating them, so I popped mine into the freezer for 15 mins.

Slightly better, but my internet research taught me that Easter egg chocolate isn't right for the job so it wasn't smooth and drippy like in the tutorials :(


So I chilled them some more and googled icing (frosting) coatings for cake pops...nada. So I just mixed up my own with icing sugar and milk.

I dipped the pops in them and added sprinkles... but there was no saving them! They looked CRAP.


So I tried again with the chocolate and added some sprinkles to hide the oopsies
Not great, but they'll do.

What I've learned:

  1. I really, really love the internet!
  2. Not all chocolate is created equal and they can't be used interchangeably.
  3. Cake pops made as whole cake balls taste WAY better than crumbled cake with frosting
  4. You can't make cake pops quickly - only do this if you have a few hours to devote to the task
  5. They taste great regardless of how they look
  6. Your kids will love them so they are totally worth it:)


Wednesday, 23 January 2013

Choc mint cupcakes


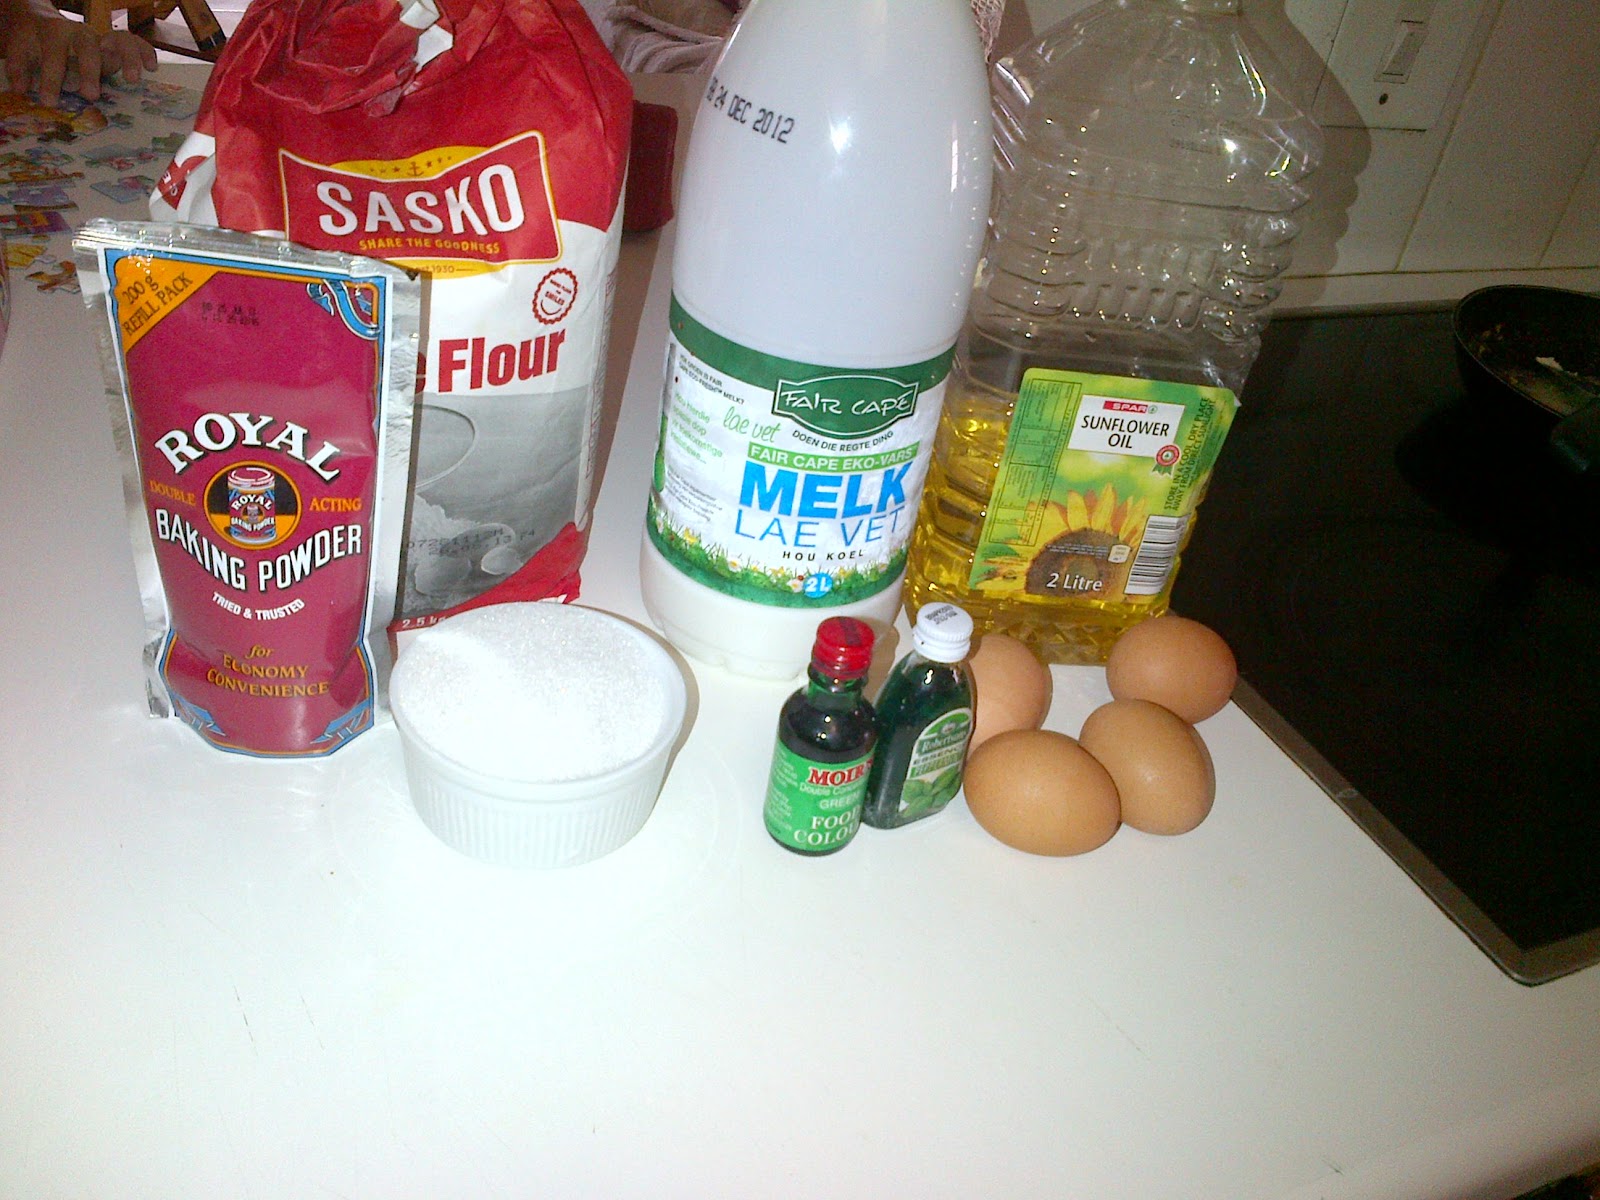
Happy days! During December, Checkers in Canal Walk had a promotion happening one day while I was shopping, where they gave you a free recipe book with every 2 large pouches of baking powder bought. Since I 1) LOVE freebies and 2) Love this particular author (she also wrote the Snowflake Too Fresh to Flop recipe book which I use all the time), I went ahead and bought the baking powder even though I didn't really need any at the time. Anyway, here's the book:


The first recipe that I HAD to make was choc mint cupcakes:)
  

 Recipe:


2 XL eggs
125ml cooking oil
125ml castor sugar
5ml peppermint essence
few drops green food colouring
500ml cake flour
15ml baking powder
200ml milk
2ml salt
50g grated mint chocolate

Choc glace icing

375ml icing sugar (confectioner's sugar)
30ml cocoa powder
45ml warm water
Extra grated chocolate for decorating

Whisk eggs, oil and castor sugar together until light and fluffy.

    Add essence and food colouring and whisk lightly.
Sift flour, baking powder and salt together. Add to egg mixture alternately with the milk.

 
Fold in grated chocolate and mix well.
 

Spoon the mixture into paper cases, filling each two thirds full. Bake at 180 degrees celsius for 12-15 mins.

    Icing: Sift icing sugar and cocoa powder together. Add warm water and beat until smooth and creamy. Ice the cooled cupcakes. Decorate with grated chocolate.

Sunday, 16 December 2012

December Leave, Day 1

 
My last day of work was also incidentally my 10th wedding anniversary J
We went to Carols by candlelight at Kirstenbosch, where the band my husband plays in
was one of the opening bands. Just before they played their song about a wedding,
I got called up on stage and my husband gave me a beautiful speech and even more beautiful ring,
so my leave started out on an exceptionally high note!
This morning was Saturday, and I love to bake on weekends, so I decided to make the easiest ever,
flop proof, no-knead, cannot-get-enough of home-made bread (courtesy of Jillee).
Here’s what you need:
5 cups of flour (bread or cake flour work equally well because there’s no kneading involved)
2 ½ cups of warm water
1 sachet of instant yeast
1T salt
2T sugar
Mix to make a thick batter/very soft and wet dough


Leave to rise till doubled, then bake for 50-60 mins.


Slice and enjoy!